Introduction
Printing in Excel can sometimes be tricky, especially when your spreadsheets don’t look as expected on paper. Whether you’re preparing reports, dashboards, or data summaries, understanding how to configure print settings ensures your printed documents are professional, readable, and formatted correctly. In this tutorial, we’ll walk through the essential print settings in Excel, with actionable steps to help you print like a pro.
Understanding Print Preview
What is Print Preview?
Print Preview allows you to see how your spreadsheet will look once printed. It’s an essential step to ensure your data is formatted correctly before wasting paper and ink.
How to Access Print Preview
- Go to the File tab on the ribbon.
- Select Print from the dropdown menu.
- The Print Preview window appears, displaying your sheet as it will appear on paper.
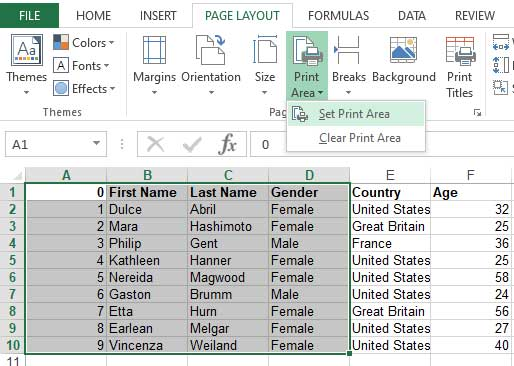
Setting the Print Area
Why Set a Print Area?
Specifying a print area ensures only the selected data is printed, avoiding unnecessary information and saving paper.
Steps to Set a Print Area
- Select the range of cells you want to print.
- Navigate to the Page Layout tab on the ribbon.
- Click on Print Area > Set Print Area.
Adjusting Page Layout
Orientation and Size
Choose the best page orientation and size for your data.
- Go to the Page Layout tab.
- Click on Orientation and select Portrait or Landscape.
- Click on Size and select the appropriate paper size, such as A4 or Letter.
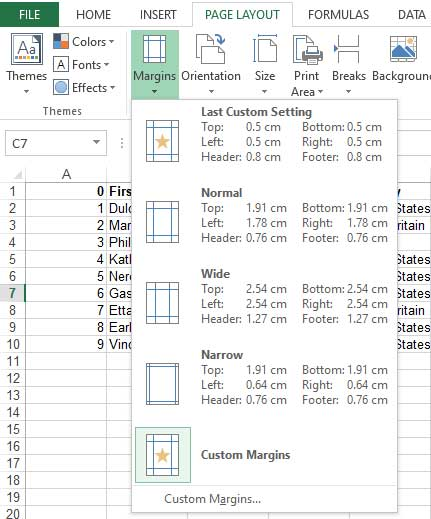
Margins
Set margins to control how much space surrounds your data.
- In Page Layout, click Margins.
- Choose from predefined margin options or click Custom Margins to set specific values.
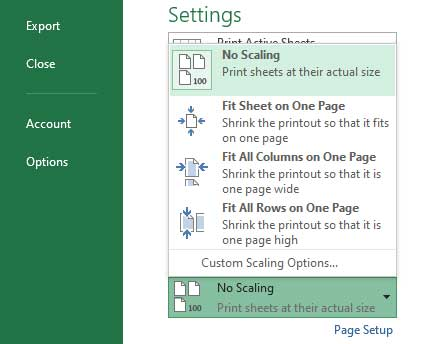
Scaling Your Printout
Use Scaling Options
Scaling adjusts the size of your printout to fit on a specific number of pages.
Steps to Scale Your Sheet
- In the Print preview, locate the Scaling options.
- Select Fit Sheet on One Page to print everything on a single page.
- Alternatively, choose Adjust to and specify a percentage.
'In the Print Settings window:
Scaling: Fit Sheet on One Page
Why Use Headers and Footers?
Headers and footers add titles, page numbers, dates, or custom text to your printed sheets, making them professional and organized.
How to Insert Headers and Footers
- Go to the Insert tab.
- Click on Header & Footer.
- The sheet switches to Page Layout view, and you can add elements in the header/footer sections.

Configuring Print Options
Advanced Print Settings
- Choose whether to print entire workbook or only selected sheets.
- Set print quality and black & white options if available.
- Preview each sheet before printing to ensure consistency.
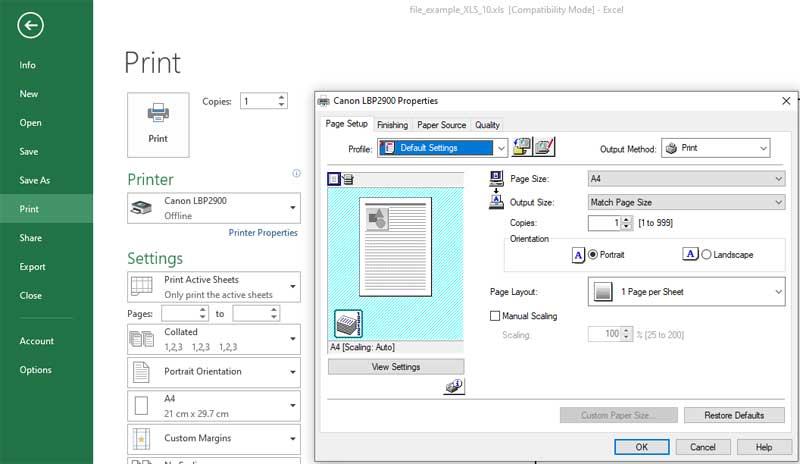
Accessing More Print Options
- In the Print window, click on Printer Properties for more options.
Final Preview and Printing
Review Your Document
Always review the print preview to verify that everything looks correct, including layout, scaling, headers, and footers.
Print Your Document
- Click the Print button in the print preview window.
- Select your printer and confirm print settings.
- Click Print to start printing.
Conclusion
Mastering Excel's print settings enables you to produce professional, well-formatted printed reports with ease. Remember to utilize print preview, set your print area, adjust page layout, and use scaling to ensure your sheets print exactly as intended. With these tips, you'll print like a pro every time!
Start Printing Like a Pro Today!
Practice these steps in your Excel workbooks and see the difference in your printed documents. For more Excel tips and tutorials, subscribe to our series and stay updated!


