Table of contents [Show]
- Introduction — Why Vue.js 3?
- Quick setup overview
- Prerequisites
- Why use Vite (recommended)
- Method 1 — Create a Vue 3 project with Vite (recommended)
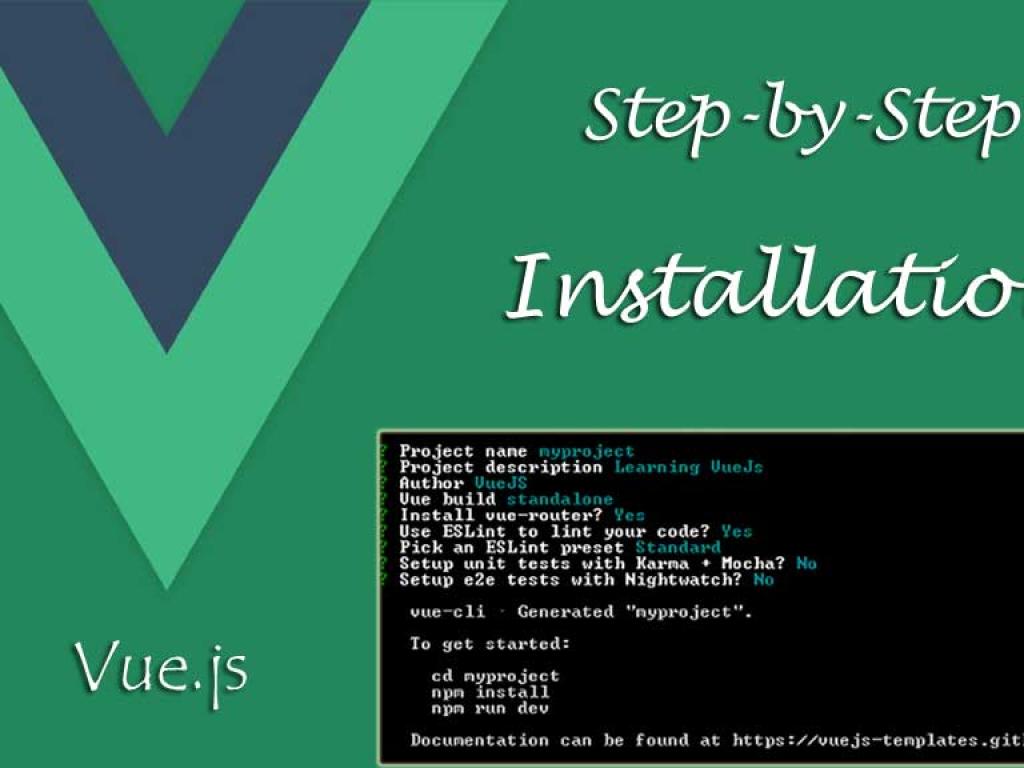
- Method 2 — Create a Vue 3 project with Vue CLI (legacy / alternative)
- Adding TypeScript
- Using the Composition API (recommended for Vue 3)
- Common tasks and code examples
- Debugging and devtools
- Build for production
- Deployment examples
- Troubleshooting — Common problems and fixes
- Best practices
- Accessibility, Internationalization (i18n), and SEO tips
- Build a tiny Vue 3 app — Step-by-step (script-style)
- Advanced topics — Monorepo, SSR, Nuxt
- Security and performance considerations
- Pre-launch checklist
- Further learning and resources
- Conclusion
Introduction — Why Vue.js 3?
Vue.js 3 is a progressive, approachable, and performant JavaScript framework for building user interfaces. It introduced architectural improvements (the Composition API, improved reactivity), better performance, and smaller bundle sizes. Whether you're building a small widget, a single-page application (SPA), or a full-scale front-end platform, Vue 3 offers a friendly developer experience and robust tooling.
In this tutorial you'll learn: creating a Vue 3 project with the recommended tool (Vite) and the older Vue CLI, setting up TypeScript, understanding project structure, writing your first component, hot module reloading, building for production, and deploying a static site. Each step includes code examples and suggestions for visuals you can use in a video or article.
Quick setup overview
At a high level, here's what we'll do:
- Install Node.js and a package manager (npm / pnpm / yarn).
- Create a new Vue 3 project using Vite (recommended) or Vue CLI (legacy).
- Explore project files and Single File Components (SFCs).
- Run the dev server and hot reload.
- Add TypeScript support (optional).
- Build for production and deploy.
Prerequisites
Make sure you have:
- Node.js (LTS version recommended). Check with
node -v. - npm (bundled with Node) or an alternative package manager:
yarnorpnpm. - A code editor like VS Code, and optionally the Volar extension for Vue + TypeScript support.
Check Node and npm
Run these commands in your terminal:
node -v
npm -v
If Node is not installed, download it from the official site or use nvm (Node Version Manager) to install a stable LTS version.
Why use Vite (recommended)
Vite is a lightning-fast build tool created by Evan You (Vue's creator) and optimized for modern web development. It uses native ES modules in development for near-instant server start and uses Rollup for production builds. For Vue 3 projects, the Vite + official Vue plugin combo is the recommended path.
Comparison: Vite vs Vue CLI
Here's a small comparison table (HTML code included below):
<table border="1" cellpadding="8" cellspacing="0">
  <thead>
    <tr>
      <th>Feature</th>
      <th>Vite</th>
      <th>Vue CLI</th>
    </tr>
  </thead>
  <tbody>
    <tr>
      <td>Dev server startup</td>
      <td>Instant / fast</td>
      <td>Slower</td>
    </tr>
    <tr>
      <td>Hot Module Replacement (HMR)</td>
      <td>Very fast, near-instant</td>
      <td>Good, but slower than Vite</td>
    </tr>
    <tr>
      <td>Plugin ecosystem</td>
      <td>Rich, modern plugins (Rollup compatible)</td>
      <td>Mature, some legacy plugins</td>
    </tr>
    <tr>
      <td>Opinionated scaffolding</td>
      <td>Minimal, flexible</td>
      <td>More opinionated (webpack based)</td>
    </tr>
    <tr>
      <td>Recommended for Vue 3</td>
      <td>Yes</td>
      <td>Supported (legacy workflow)</td>
    </tr>
  </tbody>
</table>
Method 1 — Create a Vue 3 project with Vite (recommended)
Step 1 — Create the project
Open a terminal and run one of the following commands. All three create a new project folder and scaffold the project.
Using npm (recommended)
npm create vite@latest my-vue-app -- --template vue
# or for TypeScript
npm create vite@latest my-vue-app -- --template vue-ts
Using pnpm
pnpm create vite my-vue-app --template vue
# or for TypeScript
pnpm create vite my-vue-app --template vue-ts
Using yarn
yarn create vite my-vue-app --template vue
# or for TypeScript
yarn create vite my-vue-app --template vue-ts
After running the command you'll be prompted to confirm the project name and template. If asked choose vue for JavaScript and vue-ts for TypeScript.
Step 2 — Install dependencies
Move into the project folder and install:
cd my-vue-app
npm install
# or
pnpm install
# or
yarn
Step 3 — Start the dev server
Run the development server and open the app in your browser:
npm run dev
# or
pnpm dev
# or
yarn dev
Vite will show a local URL, usually http://localhost:5173. Open that in your browser.
Step 4 — Explore the project structure
Typical Vite + Vue project layout:
my-vue-app/
├─ index.html
├─ package.json
├─ vite.config.js (or vite.config.ts)
├─ src/
│  ├─ main.js (or main.ts)
│  ├─ App.vue
│  └─ components/
│     └─ HelloWorld.vue
└─ public/
Open src/main.js to see how the app is mounted:
import { createApp } from 'vue'
import App from './App.vue'

createApp(App).mount('#app')
Step 5 — First component (App.vue)
Open src/App.vue. A simple Single File Component looks like this:
<template>
  <div id="app">
    <h1>Hello Vue 3!</h1>
    <HelloWorld msg="Welcome to Vue 3 with Vite!" />
  </div>
</template>

<script>
import HelloWorld from './components/HelloWorld.vue'

export default {
  components: { HelloWorld }
}
</script>

<style>
#app { font-family: Avenir, Helvetica, Arial, sans-serif; padding: 2rem; }
</style>
And an example HelloWorld.vue:
<template>
  <section>
    <h2>{{ msg }}</h2>
    <p>This is a basic component using the Options API.</p>
  </section>
</template>

<script>
export default {
  props: {
    msg: String
  }
}
</script>>

<style scoped>
h2 { color: #42b983; }
</style>
Method 2 — Create a Vue 3 project with Vue CLI (legacy / alternative)
Vue CLI is older and uses Webpack under the hood. It's still used in many existing projects. If you prefer Vue CLI, install it globally and scaffold a Vue 3 project with the legacy plugin.
Step 1 — Install Vue CLI
npm install -g @vue/cli
# or
yarn global add @vue/cli
Step 2 — Create a new project
vue create my-vue-cli-appDuring prompts select Manually select features, then choose Vue 3 when asked for the version (if the CLI version supports it) or use the Vue CLI plugin for Vue 3.
Step 3 — Run the dev server
cd my-vue-cli-app
npm run serve
Note: For brand new projects, Vite is recommended for a better development experience.
Adding TypeScript
TypeScript provides static typing and can improve developer productivity for larger applications. When using Vite, you can scaffold a TypeScript template (see above). You can also add TypeScript to an existing project.
Option A — Start with a TypeScript template (Vite)
npm create vite@latest my-vue-ts-app -- --template vue-ts
cd my-vue-ts-app
npm install
npm run dev
Option B — Add TypeScript to an existing project
npm install -D typescript @types/node
# If using Vue 3 + SFCs, install vue-tsc for type checking
npm install -D vue-tsc
Create a tsconfig.json (Vite often adds one automatically). Example minimum config:
{
  "compilerOptions": {
    "target": "ESNext",
    "module": "ESNext",
    "moduleResolution": "Node",
    "strict": true,
    "jsx": "preserve",
    "esModuleInterop": true,
    "skipLibCheck": true,
    "types": ["vite/client"]
  },
  "include": ["src/**/*.ts", "src/**/*.d.ts", "src/**/*.tsx", "src/**/*.vue"]
}
TypeScript in SFCs
Use the <script lang="ts"> tag inside `.vue` files:
<script lang="ts">
import { defineComponent, ref } from 'vue'

export default defineComponent({
  setup() {
    const count = ref<number>(0)
    return { count }
  }
})
</script>
Using the Composition API (recommended for Vue 3)
The Composition API makes it easier to reuse logic across components. You can still use the Options API, but the Composition API is typically recommended in new Vue 3 projects.
Simple counter using Composition API
<template>
  <div>
    <p>Count: {{ count }}</p>
    <button @click="increment">Increment</button>
  </div>
</template>

<script setup>
import { ref } from 'vue'

const count = ref(0)
function increment() {
  count.value++
}
</script>
Notice the <script setup> SFC sugar — it's concise and compiles to efficient code.
Common tasks and code examples
Installing Vue Router
npm install vue-router@4
# Basic router setup (src/router/index.js)
import { createRouter, createWebHistory } from 'vue-router'
import Home from '../views/Home.vue'

const routes = [
  { path: '/', name: 'Home', component: Home },
  { path: '/about', name: 'About', component: () => import('../views/About.vue') }
]

const router = createRouter({
  history: createWebHistory(),
  routes
})

export default router

# In src/main.js
import { createApp } from 'vue'
import App from './App.vue'
import router from './router'

createApp(App).use(router).mount('#app')
Installing Vuex / Pinia (state management)
Pinia is the new official state library and works great with Vue 3:
npm install pinia
# src/store/index.js
import { createPinia } from 'pinia'
export default createPinia()

# In main.js
import { createApp } from 'vue'
import App from './App.vue'
import pinia from './store'

createApp(App).use(pinia).mount('#app')
Adding ESLint + Prettier
Linting and formatting help maintain code quality:
npm install -D eslint eslint-plugin-vue @typescript-eslint/parser @typescript-eslint/eslint-plugin
# then create .eslintrc.js and configure rules for Vue 3 + TypeScript as needed
Debugging and devtools
Install the Vue Devtools browser extension for inspecting component trees, state, and events. For Vue 3 make sure you use the compatible version of Vue Devtools.
In development, use source maps (Vite enables them by default) so you can debug in the browser and set breakpoints directly in your original `.vue` files.
Build for production
When your app is ready, run a production build. Vite uses Rollup under the hood and optimizes code splitting, tree-shaking, and asset handling.
npm run build
# or
pnpm build
# or
yarn build
Vite outputs a dist/ folder containing static assets.
Preview a production build locally
npm run previewThe preview command serves the built files on a local static server so you can verify everything before deploying.
Deployment examples
Built assets are static files, so you can deploy them to many static hosts — GitHub Pages, Netlify, Vercel, S3, or a traditional web server.
Netlify (example)
- Connect your repository to Netlify.
- Set
Build commandtonpm run build. - Set
Publish directorytodist. - Deploy and test the live URL.
Vercel (example)
- Install Vercel CLI:
npm i -g vercel. - Run
vercelin the project directory and follow prompts.
GitHub Pages (example)
- Build:
npm run build. - Push the
distfolder to thegh-pagesbranch or use an action likepeaceiris/actions-gh-pages.
Troubleshooting — Common problems and fixes
1. Blank page after build
Often due to incorrect base path for assets. If you're deploying under a subpath (e.g., GitHub Pages), configure base in vite.config.js:
import { defineConfig } from 'vite'
import vue from '@vitejs/plugin-vue'

export default defineConfig({
  base: '/my-repo-name/',
  plugins: [vue()]
})
2. HMR not working
Check console for CORS errors; ensure the dev server is running and not blocked by a corporate proxy. Restart Vite if needed and verify correct URL.
3. Types not recognized in .vue files
Make sure your editor uses the Volar extension (for Vue 3 + TypeScript) and that tsconfig.json includes "types": ["vite/client"]. Also run npx vue-tsc --noEmit for type checks.
4. Dependency version mismatches
If you see errors referring to Vue version mismatches (e.g., Vue 2 vs Vue 3), check package.json and ensure the installed libraries support Vue 3 (use versions that explicitly state Vue 3 compatibility).
Best practices
- Prefer Vite for new Vue 3 projects.
- Use
<script setup>for concise component code. - Adopt Pinia for state management instead of Vuex for new projects.
- Use lazy loading for route-level code splitting:
component: () => import('../views/About.vue'). - Keep components small and single-responsibility.
- Add unit and integration tests (Vitest pairs well with Vite).
Accessibility, Internationalization (i18n), and SEO tips
Accessibility
- Use semantic HTML for accessibility (headings, ARIA attributes when necessary).
- Test with a keyboard only and with screen readers.
Internationalization (i18n)
Install vue-i18n for translations:
npm install vue-i18n@nextSEO for SPAs
Single Page Applications need special handling for SEO. Consider pre-rendering or server-side rendering (Nuxt 3 is the recommended full-stack framework for Vue 3 SSR).
Build a tiny Vue 3 app — Step-by-step (script-style)
The following steps are written like a video tutorial script. Use them verbatim for narration.
Script: Step 0 — Narration intro
"In this short walkthrough I'll show you how to install Vue 3, scaffold a project with Vite, and create a working single-file component. By the end you'll have a live development server and be ready to expand your app."
Script: Step 1 — Create project
"Open your terminal. I'm using Node LTS and npm. Run: npm create vite@latest my-vue-app -- --template vue. When the prompt appears, press Enter to accept defaults."
Script: Step 2 — Install dependencies
"Move into the folder: cd my-vue-app and install dependencies with npm install."
Script: Step 3 — Run the dev server
"Start the server with npm run dev. The terminal will show a local URL (typically http://localhost:5173). Open it in your browser to see the default Vue app."
Script: Step 4 — Create a new component
"In src/components, create Counter.vue and paste this code:"
<template>
 <div >
  <h2>Counter: {{ count }}</h2>
  <button @click="increment">Increment</button>
 </div>
</template>

<script setup>
import { ref } from 'vue'
const count = ref(0)
function increment() {
 count.value++
}
</script>

<style scoped>
.counter { margin-top: 1rem; }
button { padding: 0.5rem 1rem; font-size: 1rem; }
</style>
Script: Step 5 — Use the component
"Open src/App.vue and import the component: import Counter from './components/Counter.vue'. Add the tag <Counter /> to the template and save. The page updates instantly thanks to HMR."
Advanced topics — Monorepo, SSR, Nuxt
Monorepo setups
Use tools like Turborepo or pnpm workspaces if you're managing multiple packages (UI library, app, shared utils). Vite works well inside monorepos; configure path aliases and root-specific configs.
Server-Side Rendering (SSR)
For SEO-critical apps, consider SSR. Nuxt 3 is the official full-stack framework for Vue and supports SSR, static site generation (SSG), and serverless deployment patterns.
Nuxt 3 quick mention
npx nuxi init nuxt-app
cd nuxt-app
npm install
npm run dev
Nuxt 3 abstracts much of the SSR complexity and provides file-based routing, auto-imports, and modules for common features.
Security and performance considerations
- Sanitize user input to prevent XSS. Use
v-textor binding with caution when rendering raw HTML. - Use Content Security Policy (CSP) headers when deploying to reduce XSS risk.
- Lazy-load heavy dependencies and images — use modern
<img loading="lazy">or IntersectionObserver. - Enable gzip or Brotli compression on the server hosting the static assets.
Pre-launch checklist
- Run a production build:
npm run build. - Test the built site with
npm run preview. - Check for console errors and fix broken routes (ensure correct base path).
- Run aCORS and security tests, enable TLS/HTTPS.
- Set up monitoring and error reporting (Sentry, LogRocket, etc.)
Further learning and resources
When you're ready to dive deeper, explore:
- Official Vue 3 docs — examples and API reference.
- Vite docs — config, plugins, and advanced optimizations.
- Pinia docs — recommended state management for Vue 3.
- Nuxt 3 docs — SSR and full-stack patterns.
Conclusion
Vue 3 with Vite gives you an excellent developer experience with fast startup, instant HMR, and modern build outputs. This tutorial walked you through the essential steps: installing Node, creating a Vite project, writing components, adding TypeScript, and deploying the build. Use this guide as a foundation and iterate — add routing, state management, tests, and CI/CD to productionize your app.


